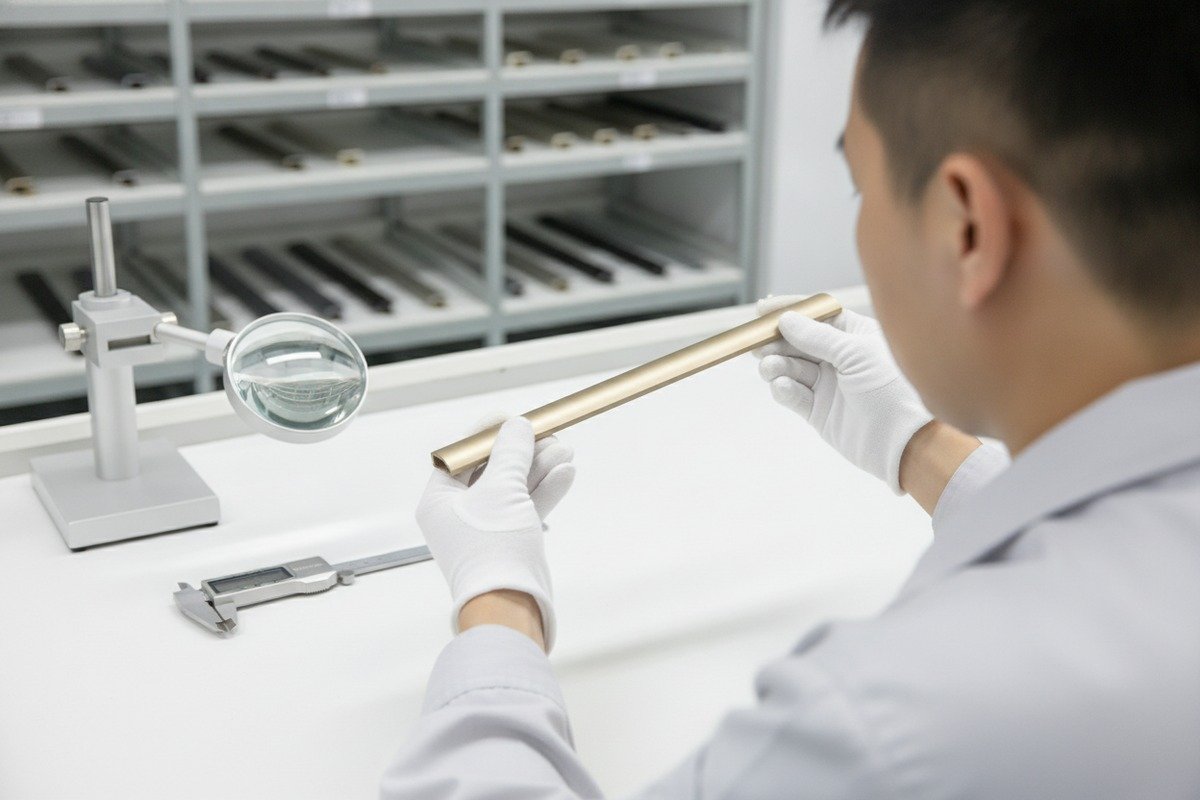
Over the past 18 years on our production floor in Foshan, our team has seen nearly every quality issue that can appear in an aluminum furniture handle order.
When sourcing aluminum furniture handles from China, you should watch for surface finish defects, dimensional inaccuracies, screw hole misalignment, inconsistent anodizing, and hidden structural weaknesses. Combine visual inspection, precision measurement, thread testing, and batch sampling to catch problems before shipment.
This guide breaks down the most common defects stage by stage — from extrusion to final packaging — and walks you through the professional inspection methods that actually work digital calipers 1. Whether you run a furniture factory or distribute building materials, this article will help you write better specs, ask better questions, and protect your next order.
What are the most common surface finish defects I should look for in my aluminum handle shipment?
Every week, our QC team reviews handles coming off our finishing lines. Surface defects are the number one reason buyers reject shipments — and many of these problems are preventable.
The most common surface finish defects include scratches, dents, pitting, uneven coating thickness, peeling or bubbling finishes, visible weld marks, and discoloration. These defects appear during extrusion, machining, handling, or surface treatment and directly affect both aesthetics and corrosion resistance.
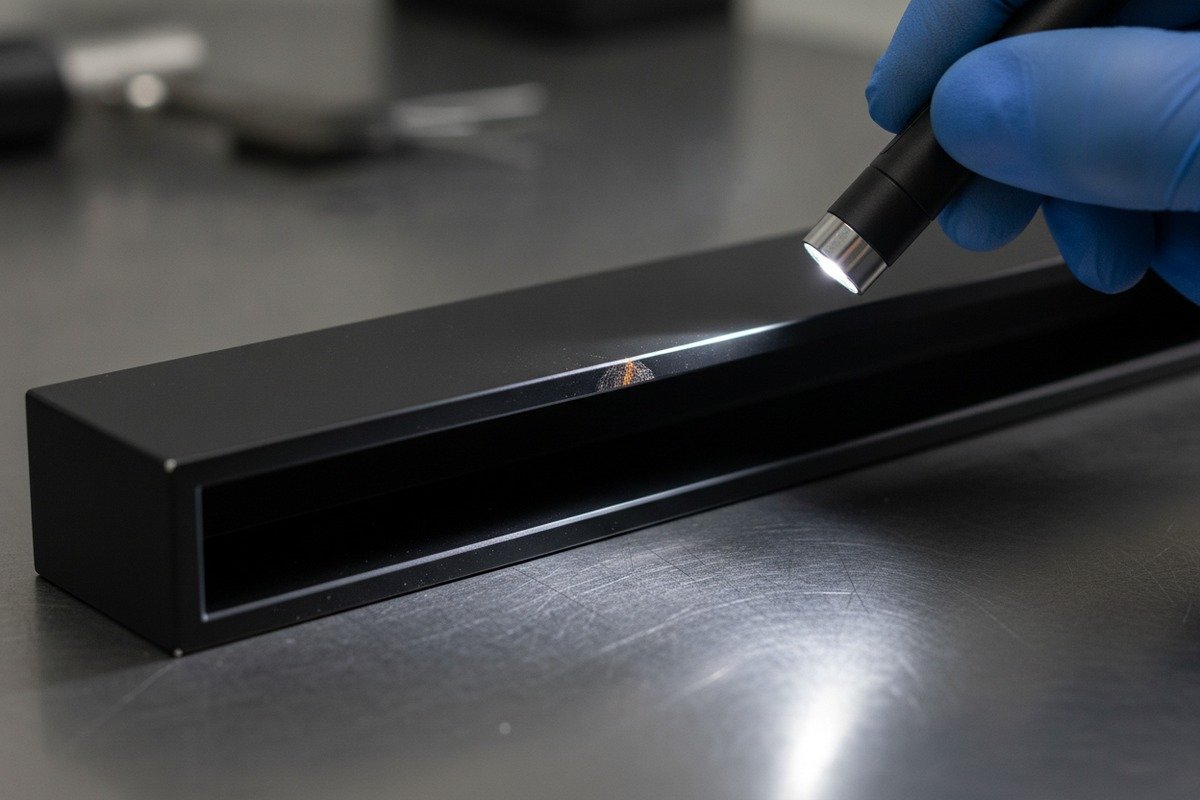
Surface defects on aluminum furniture handles usually fall into two categories: defects you can see immediately and defects that only show up under specific lighting or after installation. Both matter, especially when your end customer expects a premium, uniform look across dozens or hundreds of cabinets.
Scratches, Dents, and Handling Marks
Scratches are the most frequent cosmetic issue. They happen during extrusion, CNC machining, tumbling, manual handling, and even packaging. A single scratch on a matte champagne gold handle is easy to spot under showroom lighting. Dents often come from careless stacking or poor inner packaging. When handles are packed loose or without protective film, they rub against each other during transit. On our production line, we wrap each handle in a PE protective sleeve 2 before boxing. This small step eliminates most transit damage.
Coating and Finish Inconsistencies
Inconsistent finish is a bigger problem than most buyers expect. It shows up as color variation between handles in the same batch, uneven gloss, or visible texture differences. For anodized handles, uneven oxide layer thickness 3 causes color mismatch. For powder-coated handles, improper curing temperature or contaminated spray booths create rough spots, orange peel texture, or thin spots that chip easily.
Burrs, Sharp Edges, and Rough Arcs
Burrs are small metal ridges left over from cutting or machining. They feel sharp to the touch and look unprofessional. On recessed or L-shaped profile handles, burrs tend to hide inside the finger grip channel. If your supplier skips deburring or does it poorly, your end users will feel it every time they open a cabinet door.
| Defect Type | Where It Occurs | How to Detect | Risk Level |
|---|---|---|---|
| Scratches | Anywhere on handle surface | Visual check under 45° angled light | Medium |
| Dents | Flat faces and edges | Run finger along surface; visual check | Medium |
| Pitting | Anodized or raw surfaces | Magnified visual inspection | High |
| Coating bubbling/peeling | Powder-coated or painted handles | Adhesion cross-cut test | High |
| Color variation | Across batch | Compare samples side by side under D65 light | Medium |
| Burrs/sharp edges | Cut ends, screw holes, finger channels | Touch test, visual magnification | High |
| Visible weld marks | Joined or welded profiles | Visual check, feel test | Medium |
What to Do About It
Ask your supplier for a surface defect acceptance standard before production. Define which defects are "critical" (auto-reject), "major" (limited allowed per carton), and "minor" (cosmetically acceptable). Without this document, you and your supplier will argue about every scratch.
How can I verify the dimensional accuracy and screw hole alignment of my custom handles?
When our engineering team prepares tooling for a new handle profile, we know that even a 0.3 mm error on hole spacing can make installation a nightmare for the furniture factory on the other end.
To verify dimensional accuracy and screw hole alignment, use digital calipers, pin gauges, and go/no-go fixtures to measure handle length, width, projection, hole center-to-center distance, and hole diameter. Always check against your approved drawing, not the supplier's internal spec.
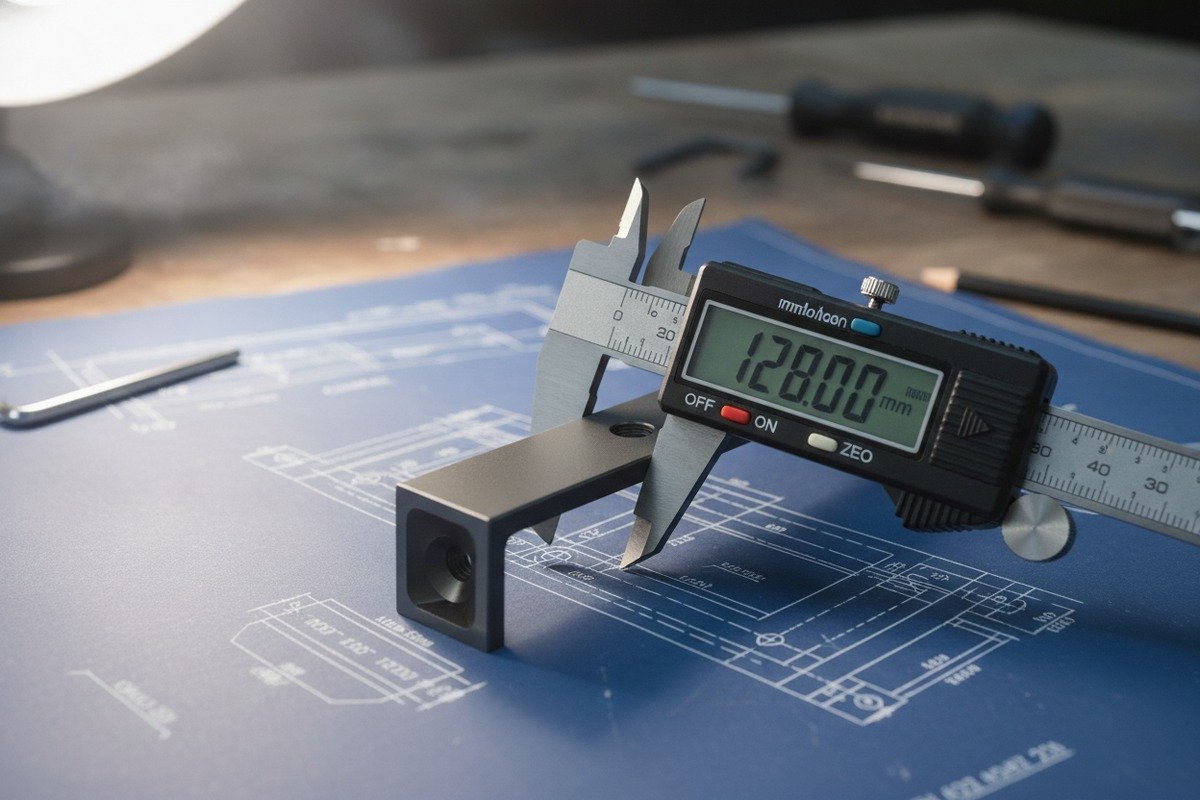
Dimensional problems are not always visible. A handle can look perfect on the outside but fail to mount correctly because the holes are 1 mm off or the total length is 0.5 mm too long. These "invisible" defects cause the most frustration during installation.
Critical Dimensions to Measure
Every aluminum furniture handle has a set of critical dimensions that must match the approved drawing. The most important ones are:
- Hole center-to-center distance (hole spacing): This must match the cabinet drill pattern exactly. Even 0.5 mm off can cause the handle to sit crooked.
- Overall length and width: Especially important for recessed or flush-mount handles where the handle fits into a routed channel.
- Projection (standoff from surface): Determines how far the handle sticks out from the door face. Too much or too little changes the feel and look.
- Hole diameter and depth: Must accept the specified screw without being too tight or too loose.
- Wall thickness: Thin spots weaken the handle and indicate poor extrusion control.
Tools and Methods
You do not need a laboratory to check handle dimensions. A small set of affordable tools covers most needs.
| Tool | What It Measures | Accuracy | Cost |
|---|---|---|---|
| Digital caliper (150 mm) | Length, width, projection, hole diameter | ±0.02 mm | $15–$40 |
| Pin gauge set | Hole diameter (go/no-go) | ±0.01 mm | $30–$80 |
| Depth gauge | Hole depth, channel depth | ±0.02 mm | $15–$30 |
| Steel rule (300 mm) | Overall length, rough check | ±0.5 mm | $5 |
| Go/no-go fixture (custom) | Hole spacing, profile fit | Per drawing tolerance | $50–$200 |
| Height gauge | Projection, step heights | ±0.01 mm | $40–$100 |
How to Sample
Do not measure only one handle. Pull at least 5 pieces from 5 different cartons in the shipment. Measure all critical dimensions on each piece. Record the data. If any piece falls outside the tolerance range on your drawing, expand the sample size. This approach follows common AQL sampling logic 5 and catches drift that happens across a production run.
Functional Fit Testing
Numbers on paper are important, but nothing replaces a real fit test. Take 3–5 random handles and mount them on an actual cabinet door or a test jig. Check that:
- Both screws engage cleanly and pull the handle flush to the surface.
- The handle sits level and does not rock.
- The finger grip channel is accessible and comfortable.
- There is no visible gap between the handle and the door.
If a handle fails the fit test despite measuring within tolerance, the issue may be a bent profile, warped extrusion, or inconsistent screw insert depth. These problems only reveal themselves during physical installation.
What professional inspection methods should my team use to ensure the anodizing quality is consistent?
In our anodizing workshop, we run strict process controls on bath chemistry, voltage, timing, and sealing. But even with 18 years of experience, we know that buyers need independent ways to verify what they receive.
To ensure consistent anodizing quality, use a coating thickness gauge to verify oxide layer thickness, perform a dye-spot or acid-dissolution seal quality test, compare color under standardized D65 lighting, and conduct a salt spray test on samples to confirm corrosion resistance across the batch.

Anodizing is one of the most popular surface treatments for aluminum furniture handles. It creates a hard, corrosion-resistant oxide layer and allows for elegant colors like champagne gold, matte black, or light bronze. But anodizing quality varies enormously between suppliers, and poor anodizing is one of the hardest defects to catch with the naked eye until it is too late.
Why Anodizing Fails
Poor anodizing usually comes from one of these causes:
- Insufficient oxide layer thickness: The handle looks fine but corrodes quickly because the anodic film is too thin.
- Incomplete sealing: After anodizing, the porous oxide layer must be sealed (usually in hot water or nickel acetate). Bad sealing allows stains, fingerprints, and corrosion to penetrate the surface.
- Contaminated bath chemistry: Impurities in the anodizing tank cause pitting, streaking, or dull spots.
- Uneven current distribution: Parts hung too close together or with poor racking get uneven oxide thickness, leading to color variation.
Key Inspection Methods
Here is a practical breakdown of the tests your team or third-party inspector can perform:
| Test | What It Checks | Equipment Needed | Pass Criteria (Typical) |
|---|---|---|---|
| Eddy current coating thickness | Oxide layer thickness | Coating thickness gauge 6 (e.g., Fischer or Elcometer) | ≥ 10 µm for architectural, ≥ 5 µm for decorative |
| Dye-spot seal test (ISO 2143) | Seal quality | Acid dye solution, timer | No stain or very faint stain after 15 min |
| Color comparison under D65 | Color consistency | D65 light booth or handheld spectrophotometer | ΔE ≤ 1.0 for tight match; ≤ 2.0 for acceptable |
| Salt spray test (ASTM B117) | Corrosion resistance 7 | Salt spray chamber | No white corrosion for ≥ 336 hours (architectural grade) |
| Adhesion test (cross-cut, ASTM D3359) | Coating adhesion to substrate | Cross-cut blade, adhesive tape | No peeling or flaking at cut intersections |
| Visual inspection | Surface uniformity, defects | Good lighting, magnifying glass | No pitting, streaking, discoloration, or fingerprint stains |
Batch Consistency Is Key
Anodizing color can shift between production batches even at the same factory. The alloy composition, extrusion lot, and anodizing bath age all influence the final color. To protect yourself:
- Request that all handles in your order come from the same anodizing batch.
- Keep a sealed reference sample (a "master sample") and compare incoming goods against it.
- If your order is large enough to require multiple anodizing runs, ask the supplier to send you a color swatch from each run before shipping.
A Note on Champagne Gold and Light Bronze Finishes
These popular finish colors are achieved through electrolytic coloring or interference coloring after anodizing. They are more sensitive to process variation than clear or black anodizing. On our production line, we calibrate the electrolytic bath every shift and run test pieces before loading a full batch. If your supplier does not do this, expect noticeable color shifts within the same pallet.
How do I identify potential structural weaknesses or material impurities before my order leaves the factory?
Our extrusion presses run alloys like 6063-T5 8 and 6061-T6 every day. We test each incoming billet lot, because we learned early on that a "cheap" aluminum billet can ruin an entire production run and cost far more than the savings.
To identify structural weaknesses and material impurities, request the supplier's mill test certificate for the aluminum alloy, perform hardness testing on random samples, check for uneven wall thickness with a caliper, and conduct a simple bend or load test to confirm the handle meets its intended mechanical performance.

Structural problems are the most dangerous category of defects because they are invisible until the handle fails in use. A cracked handle, a snapped mounting point, or a deformed profile under normal load can lead to product returns, warranty claims, and even injury. These failures almost always trace back to material issues, poor extrusion control, or inadequate heat treatment.
Material Verification
Aluminum alloy 9 grade matters. The two most common alloys for furniture handles are 6063 and 6061.
- 6063-T5: Softer, easier to extrude into complex profiles, excellent surface finish. Good for decorative handles with moderate load.
- 6061-T6: Harder, stronger, better for handles that must bear significant pull force or support heavy drawers.
If a supplier uses a cheaper, off-spec alloy or recycles scrap without proper composition control, the handle may look identical but behave differently. It could be too soft, too brittle, or corrode faster.
What to ask for:
- Mill test certificate (MTC) showing alloy composition (Si, Mg, Fe, Cu, etc.) and temper.
- Hardness test results (Rockwell B or Webster hardness).
- If the supplier cannot provide these, that is a red flag.
Detecting Uneven Wall Thickness
Profile handles are hollow or semi-hollow extrusions. The wall thickness must be consistent to ensure uniform strength. Uneven wall thickness usually means the extrusion die is worn or the press settings are wrong. Use a digital caliper or ultrasonic thickness gauge to spot-check wall thickness at multiple points along the handle length.
Simple Mechanical Tests
You do not need a materials lab to catch weak handles. Here are practical tests you can do at the factory or warehouse:
- Bend test: Hold the handle at both ends and apply moderate hand pressure. A properly tempered 6063-T5 handle should resist bending without permanent deformation.
- Load test: Mount the handle on a test door and hang a 10 kg weight from the center for 24 hours. Check for bending or mounting point failure.
- Drop test: Drop 3 random handles from 1 meter onto a hard surface. Check for cracks, dents, or broken mounting points.
What About Impurities?
Material impurities show up as:
- Hard spots or inclusions visible as dark specks on machined or anodized surfaces.
- Uneven anodizing caused by alloy segregation.
- Brittleness that causes cracking during machining, bending, or installation.
If you see random dark spots in your anodized handles or experience unexpected breakage, request a spectrometer analysis 10 of the alloy. This test takes minutes and clearly shows whether the alloy matches the claimed grade.
A Buyer's Pre-Shipment Checklist
Before your order ships, make sure the following items are confirmed:
- Mill test certificate matches order spec.
- Hardness readings fall within expected range for the alloy and temper.
- Wall thickness measured at 3+ points per handle on 5+ samples from different cartons.
- No visible cracks, inclusions, or dark spots on machined or anodized surfaces.
- Screw engagement is smooth; threads are not stripped or cross-threaded.
- Packaging uses PE film, foam dividers, or individual sleeves to prevent transit damage.
Conclusion
Quality defects in aluminum furniture handles come from every stage of production. By inspecting surface finish, dimensions, anodizing, and material integrity with the right tools and methods, you protect your business and your customers. If you need handles backed by 18 years of process control and ready-to-ship inventory, reach out to our team at Al**************@********************************************te.com.
Footnotes
1. Describes a common precision measuring tool used in quality control. ↩︎
2. Offers information on disposable PE coated sleeve protectors and their protective qualities. ↩︎
3. Explains the importance of the protective layer’s depth in anodizing. ↩︎
4. Provides a comprehensive overview of surface defects and surface preparation in manufacturing. ↩︎
5. Details a widely used statistical method for quality inspection. ↩︎
6. Describes an instrument for measuring the thickness of protective layers. ↩︎
7. Provides information on how materials resist degradation from environment. ↩︎
8. Provides details on a specific aluminum alloy and its temper designation. ↩︎
9. Provides general information about the material used for handles. ↩︎
10. Explains a method for determining the elemental composition of materials. ↩︎